Managing your domain’s Sender Policy Framework
What is HostedSPF?
DMARC Director’s HostedSPF functionality provides major extensibility, validation and ease-of-use benefits to Sender Policy Framework (SPF) email authentication.
This takes the form of two primary functions:
- SPF Flattening, wherein the SPF entries used by the domain are compacted into a small, automatically expanding list that allows for SPF lookup quantities far beyond the SPF specification’s 10-record lookup limit. DMARC Director’s SPF Flattening functionality also checks all entries for updates or changes every 20 minutes, ensuring that providers who frequently change their entries, like ConstantContact, SendGrid, MailChimp and others are always up to date and requires no manual interaction.
- Record Validation checks each entry being made to SPF to ensure it conforms with the proper syntax that the SPF mechanisms use. Since SPF entries are a relatively uncommon change for most organizations, it’s easy to get the text entries incorrectly prefixed or with erroneous punctuation added, which will invalidate the entire SPF record (known as a PermError state, for being in permanent error). HostedSPF guides an administrator along the path and fills in as much syntax as is possible to minimize errors.
In this guide, you'll learn how to configure HostedSPF for your domain. It simplifies SPF management, keeps your record within the 10-lookup limit, and lowers the chances of syntax issues.
Navigating the HostedSPF Dashboard
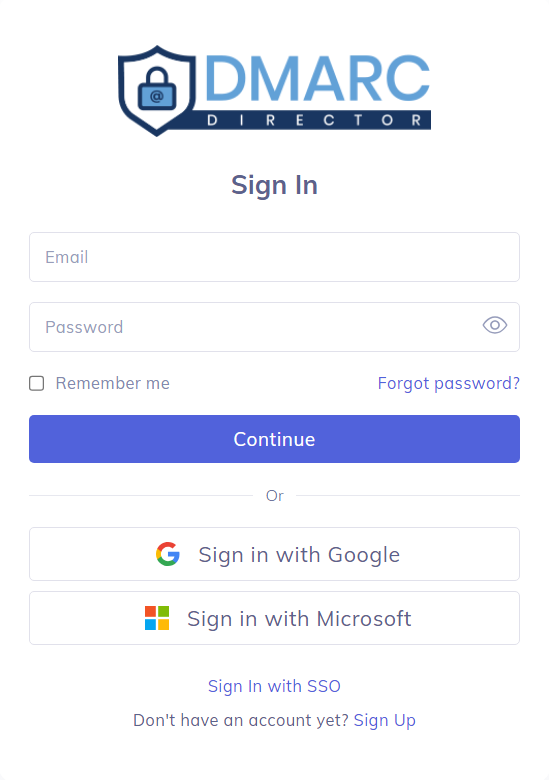
To begin your HostedSPF deployment, sign in to DMARC Director at https://director.tangent.com to access the DMARC Director dashboard.
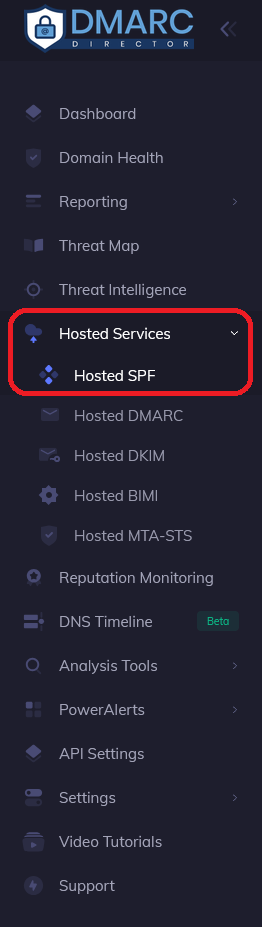
Once logged in, locate the left-hand side menu displaying the various features of DMARC Director. Expand the Hosted Service menu, then navigate click on the Hosted SPF tab.
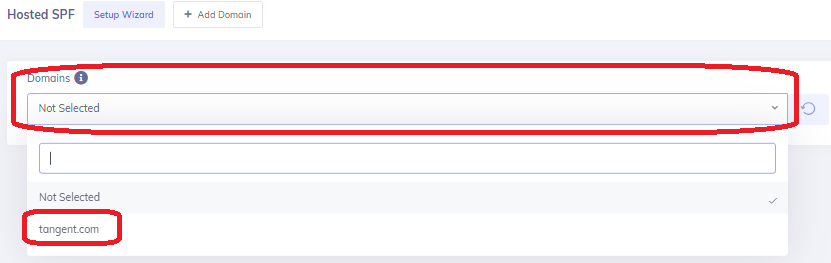
On the Hosted SPF page, open the Active Domain dropdown menu to view your registered domain(s), then select the domain to be managed.
Note: These domains are added by the DMARC Director support team at time of onboarding; no manual additions are necessary. If there is a need to add any additional domains in the future, or change existing domains, please contact the support team here.
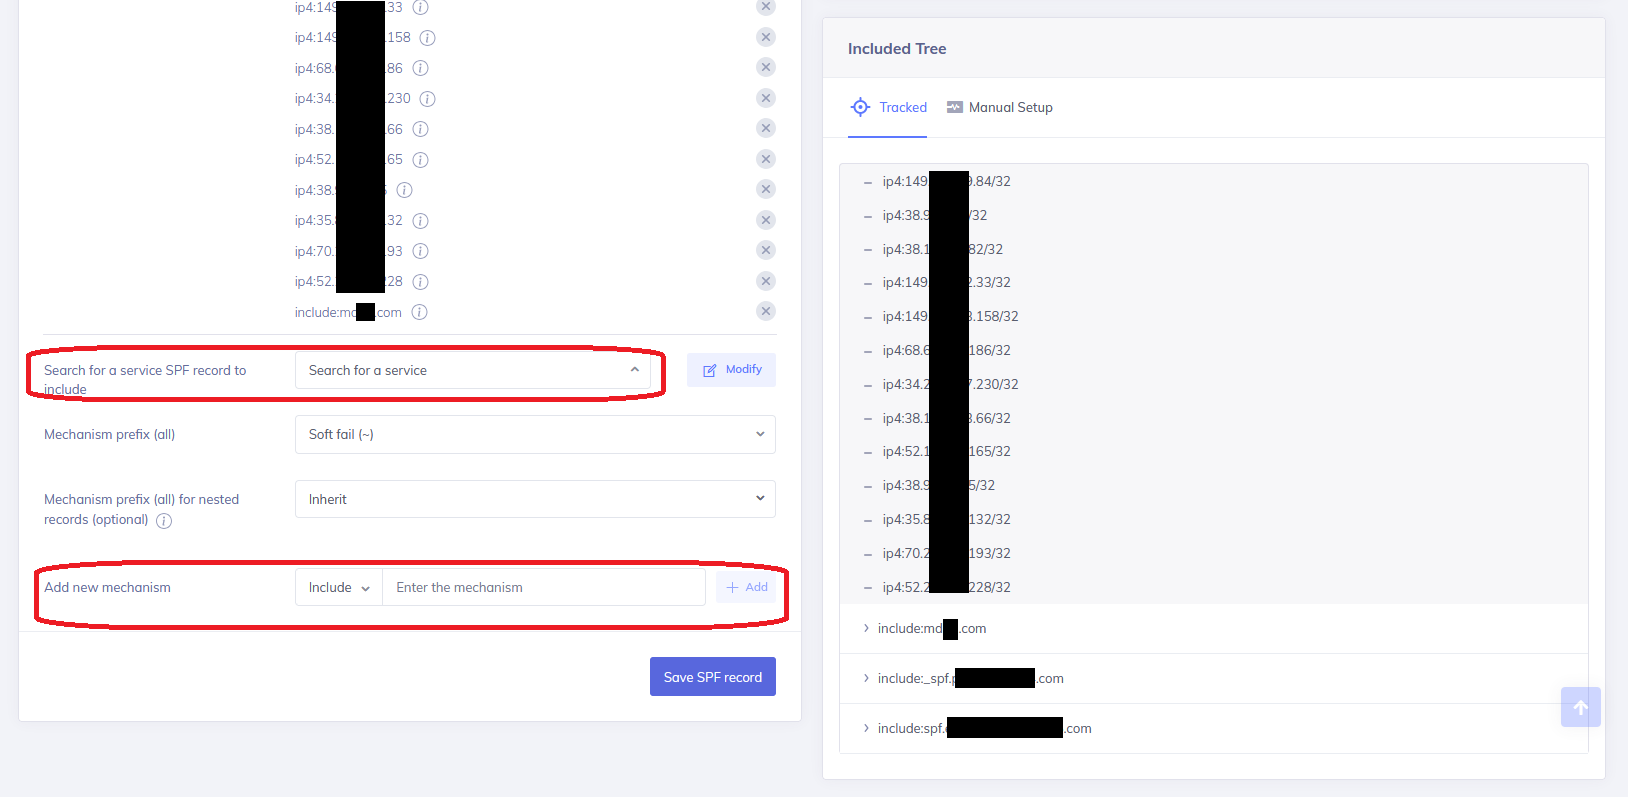
Once the domain has been selected, the page will display the current SPF record,
including the
domain’s currently active SPF record (which may be different than the HostedSPF record,
if
HostedSPF is not in use yet), along with any mechanisms configured for it.
The Quantity of DNS lookups will also appear, as well as options for semi-guided
additions or
changes to be made to the SPF record, including preconfigured service provider options
for
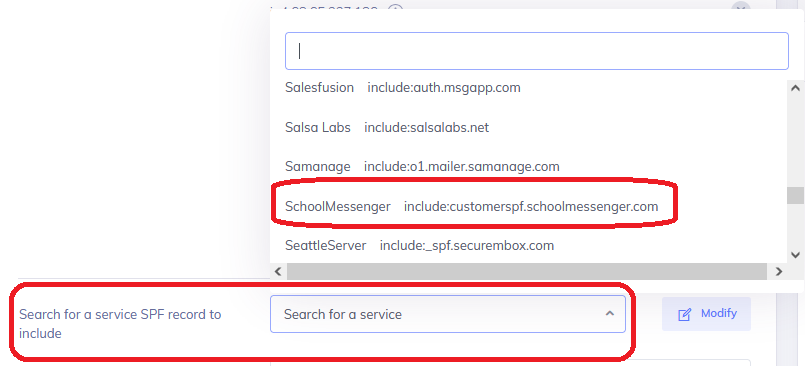
popular services like SchoolMessenger, Sendgrid, Campaigner, ProofPoint and more.

Adding New Entries in HostedSPF
SPF changes occur over time as services are added or removed by an organization, and with that comes the need to change SPF authorizations. These are the most common SPF changes that an administrator needs to take and are quite simple to implement, but can be error-prone due to the uncommon syntax used by the SPF standard.
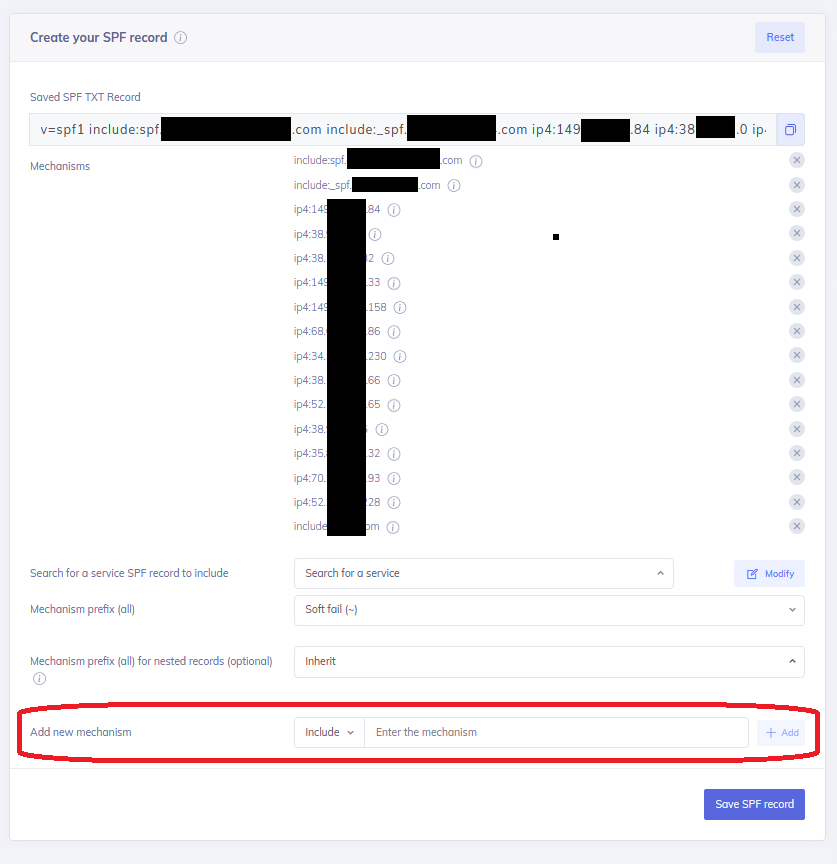
To add new entries (known as mechanisms) to your SPF record, go to the Add New Mechanism section, located in the bottom left corner of the HostedSPF page.
Note: The “Search for a service SPF record to include” option may also include the records needed and can be faster to add.
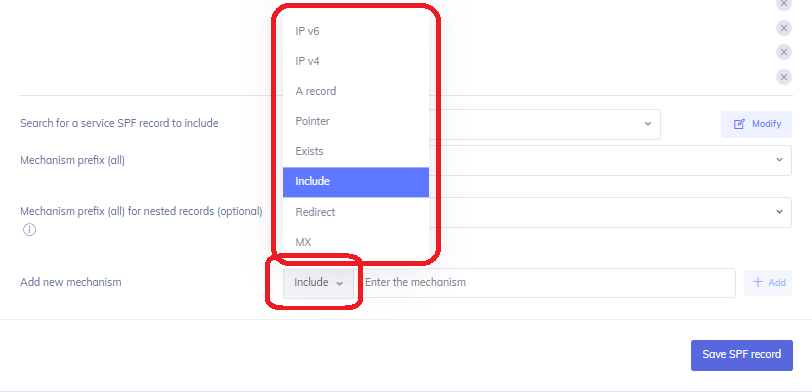
Choose the way to authorize sending sources on your SPF record by selecting the mechanism dropdown menu.
Different mechanism types exist for different purposes, such as “IP4” being used for individual IPv4 IP addresses (such as an individual mail server or gateway) and “Include” being capable of referencing another domain’s SPF record (and all of their contained IP4/IP6 entries) in a single entry. More information on the different SPF mechanisms can be in this adjoining SPF knowledge base article.
In general, the service provider will specify what kind of mechanism to use for SPF entries, but if in doubt, please contact DMARC Director support.
Once the desired mechanism has been selected, type in the specific record information
from
the
service provider.
The validation process of HostedSPF will take place in real time, ensuring that the data
entered
matches the syntax necessary for the mechanism.
For example, using the IP4 mechanism requires the usual four octet IPv4 address scheme.
Entering
in an IPv6 address or a Fully Qualified Domain Name (FQDN) under an IP4 mechanism will
turn the
text outline box to red with a red exclamation mark at the end, and disallow the
addition of the
record.
When the properly formatted record is added, the outline box will become green and offer
a green
checkmark at the end. The “Add” button will also light up to allow for insertion.
Click Add to add this new mechanism to the SPF record.


The newly added mechanism will now appear in the list of active mechanisms.
Once all other SPF additions or changes are complete, click Save SPF Record to
apply your
changes.
Once the SPF record has all the desired entries, move ahead to the enablement process
for
HostedSPF to begin using this record going forward.

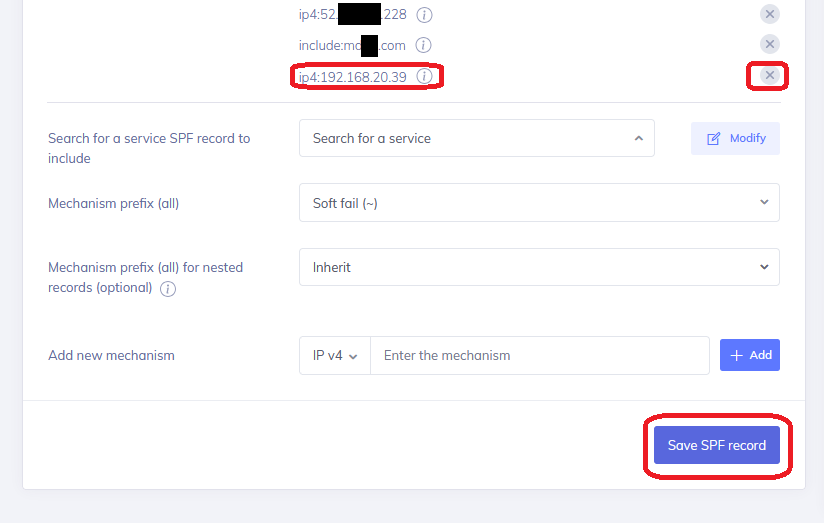
Deleting Old Entries in HostedSPF
Removing an old SPF entry from the SPF record is an easy process; simply click the
“X”
button
next to the entry to be deleted, then select Save SPF Record to apply the change.
Once the SPF record has all the desired entries, move ahead to the enablement process
for
HostedSPF to begin using this record going forward.
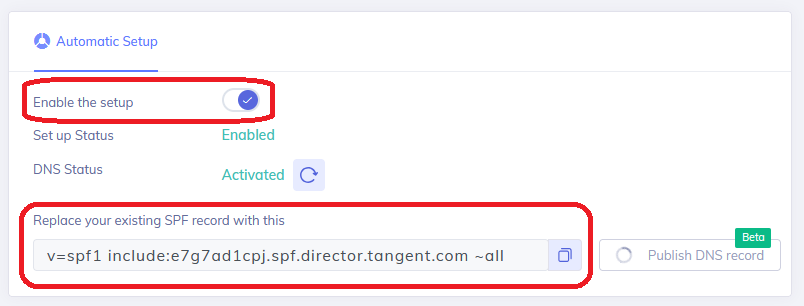
Enabling HostedSPF for the Domain
The final two steps of enabling HostedSPF are in the Automatic Setup section.
Slide the “Enable the Setup” toggle to the right to activate the service, which
will
begin the
SPF Flattening process and consolidate the SPF records added into a SPF-standard
compliant
format.
A new SPF record will be generated, which should be copied over into the domain’s public
DNS and
will replace the current SPF record (if present; be sure to check if one exists first,
as having
multiple SPF records will invalidate all of them). This new SPF record is dynamically
linked
back to DMARC Director’s HostedSPF and will become the new Source of Authority for the
domain’s
SPF records. Once this step is complete, your new HostedSPF record will be live and
ready for
action!
Note: If HostedSPF is disabled, you can still add new sources through the
service.
However, the
previous HostedSPF record will remain live in the domain’s public DNS and any changes
made won't
be reflected in the published record until it's enabled.
Making changes in the public DNS can be a daunting task; if in doubt, please do not
hesitate the
contact DMARC Director Technical Support for a guided walkthrough on how to do it
safely.